Kira Grogg · this is what i do

fb g+ tw pin

Kira Grogg's Blogg

Check out the posts below to see craft projects, short book reviews, random quotes, and little rants


Long recipe title = many sources of deliciousness.

The following recipe is based on this one from smitten kitchen. This is by far the best scone base I've found (to my taste).  I was looking for a recipe that mimicked the insanely moist scones one can buy at Lazy Jane's in Madison, WI. Lazy Jane's has hands down the best scones ever, and frankly my favorite breakfast baked good. 

Because my baking is mostly eaten by me alone (and occasionally a little help from my husband or friends), I like to make smaller batches. Thus I present to you, a half-batch of scones (4-6 scones) with basic directions. You'll find a lot more use of teaspoons. The key to these creamy scones is the generous dose of heavy cream (obvs).

The recipe

Oven to 425°F. (Don't be like me so be sure it doesn't creep up to 450°F)

1 cups (130 grams)  flour

1.5 teaspoons baking powder

4 teaspoons sugar

1/4 teaspoon salt

2.5 tablespoons (35 grams) chilled, unsalted butter, cut into 1/4-inch cubes

Zest of 1 orange

~1/4 cup (30 g) dried cranberries, chopped

~1/4 cup (30 g) mini chocolate chips

1/2 cup - 1 teaspoon heavy cream

~2-3 teaspoons orange juice, divided

powdered sugar

orange extract (optional)


Mix flour, baking powder, sugar and salt.  In food processor or with a pastry cutter, blend in the butter until distributed and crumbly. Add in chopped cranberries or other dried fruit and orange zest. Blend a little bit more.

Move flour mixture to a bowl and mix in the mini chips. Add in not quite a half cup of heavy cream and one teaspoon of orange juice. I have had trouble with dough being too wet, so I usually add slightly less cream and only add more if needed.  

Turn out the dough onto a lightly floured work surface (been using a silpat mat for this). Pat into a rectangle about 3/4 - 1in thick and cut out circles (I used 7 cm and 6 cm cutters). Collect scraps, squish together, and repeat until all the dough is used. Cutting with a sharp cutter is important so as to not crimp the sides and impede rising.

Bake on lined (silpat or parchment paper) baking sheet for 10-12 minutes.  They should be a bit golden, but don't over bake or they will no longer be moist.  Cool on a rack.

Mix remaining ~teaspoon of orange juice and enough powdered sugar to make a runny glaze. I never bother to measure for glazes. I just gradually add more sugar or liquid until I get the right consistency. For these I added just a dash of orange extract and orange food coloring to make the glaze extra orange-flavored and orange-colored.  Drip glaze over cooled scones.

Eat. Enjoy. (Then maybe exercise...) 

This recipe should make about 4 properly sized scones, or 6 slightly flatter scones, or 8 if you use a smaller cutter for some of them. 

The results

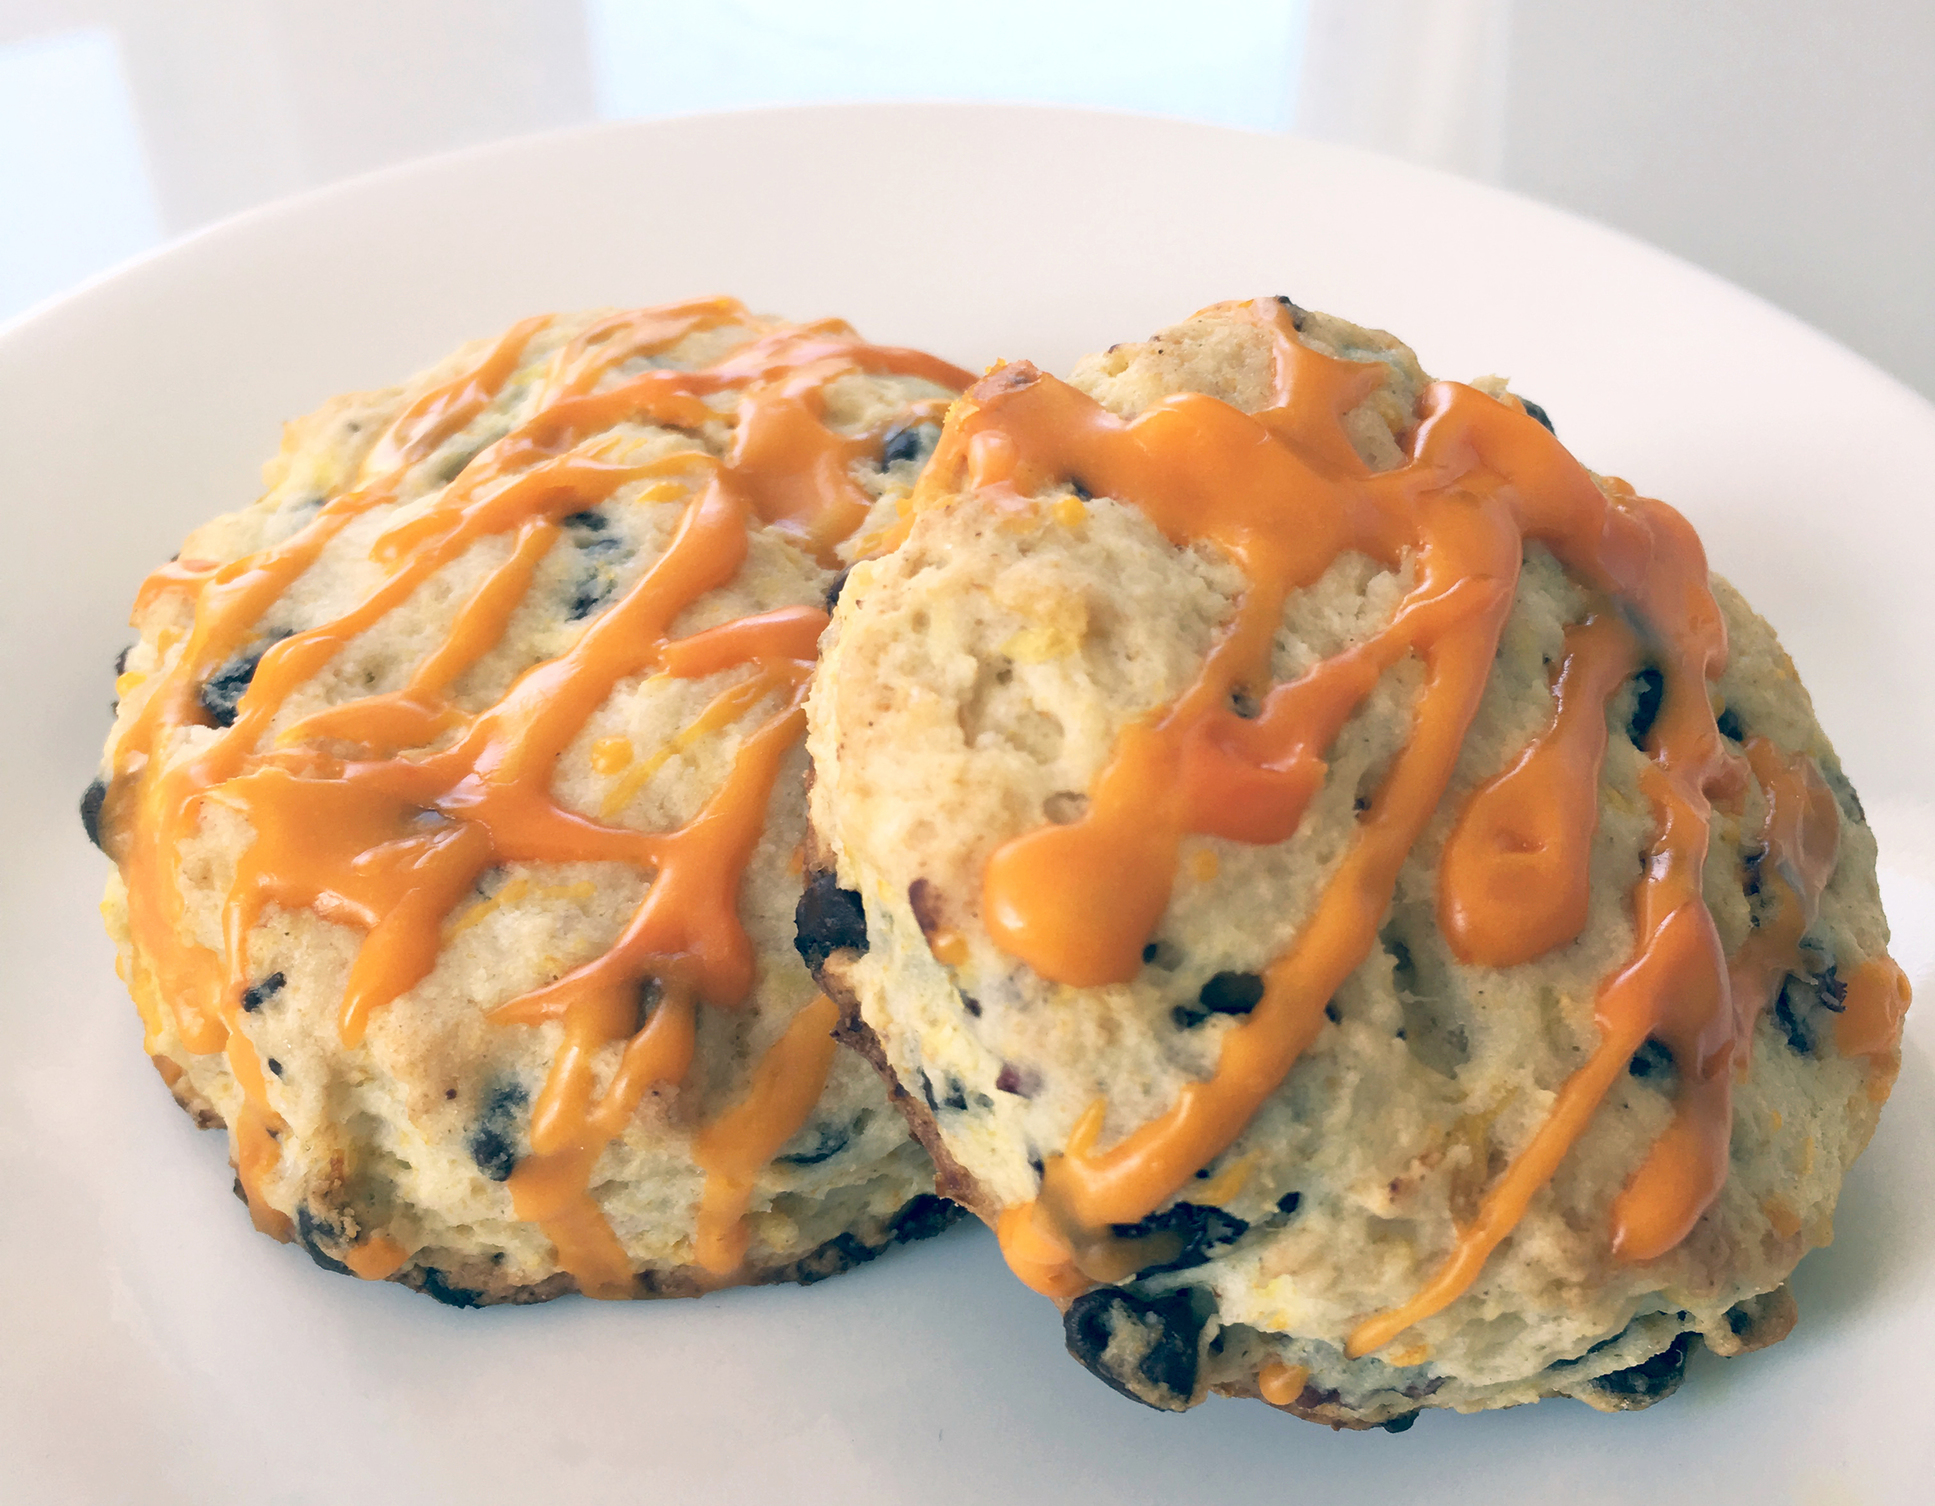
Someday I will learn how to take a proper photo, but here they are:

   
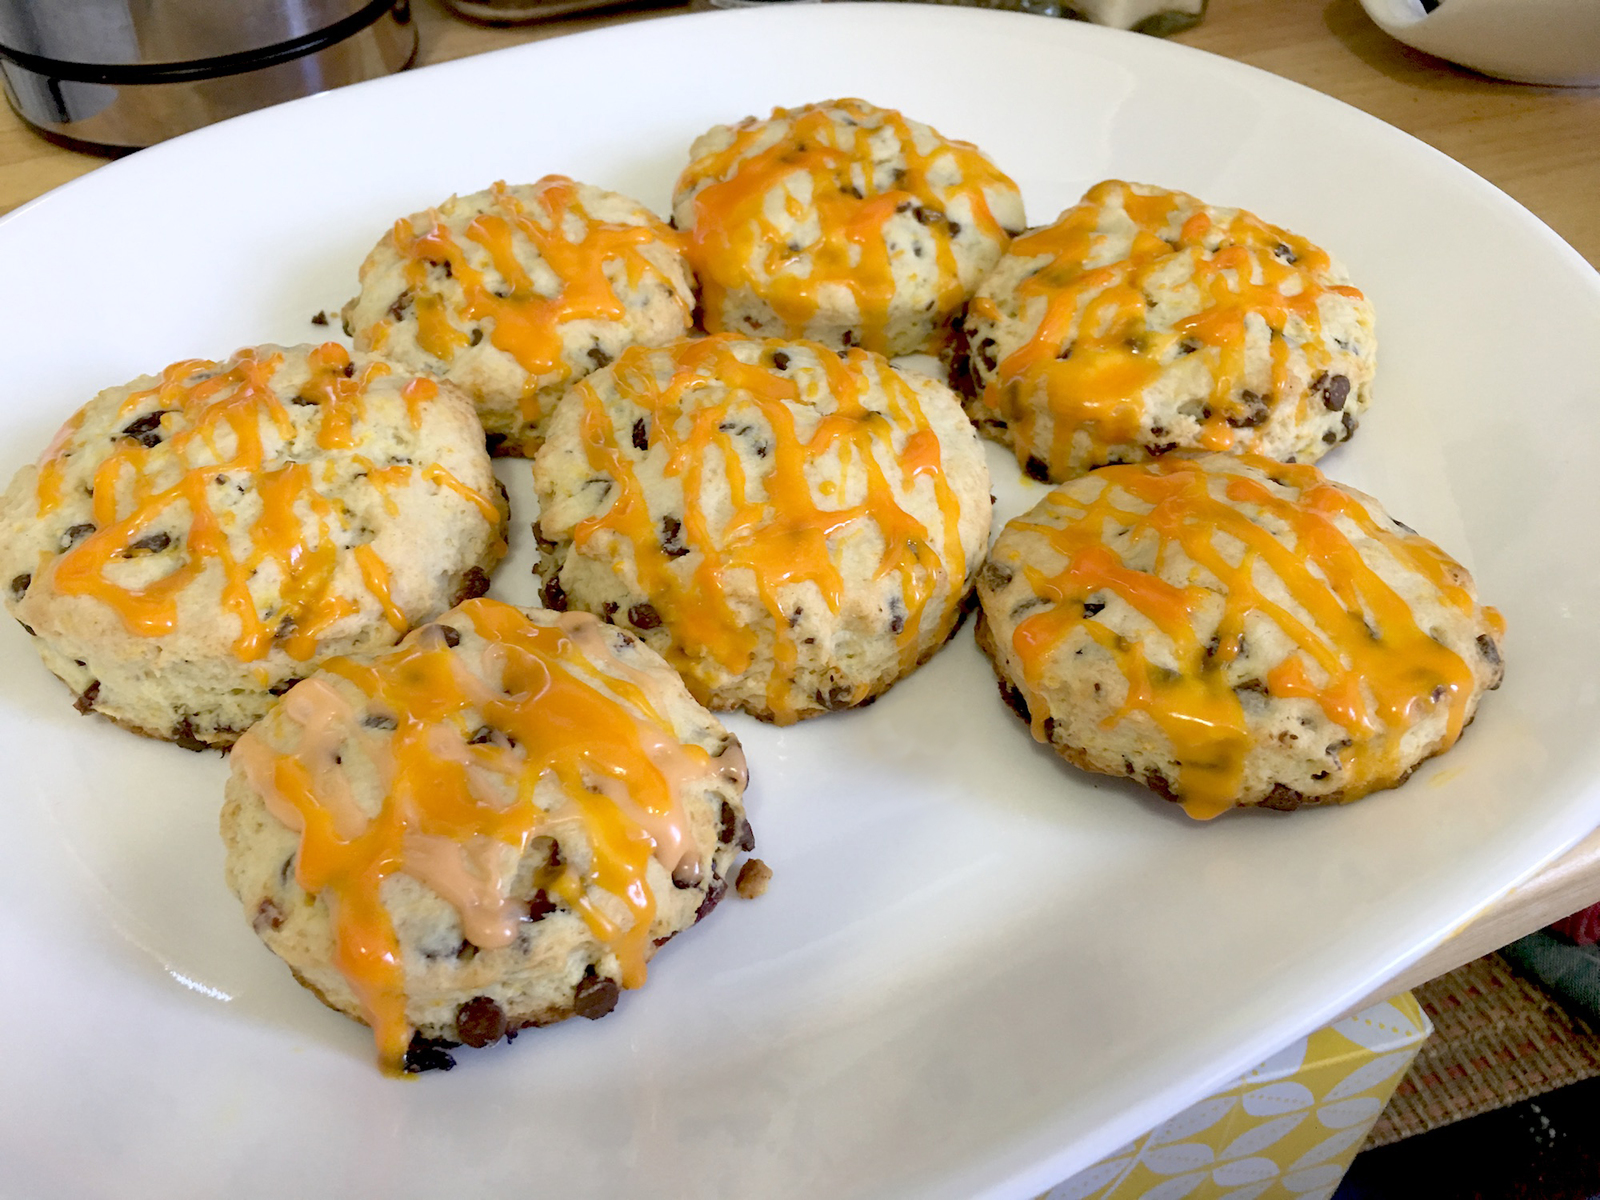
(There is a gap on the plate because I already ate the baby one made from the last few scraps.)

As you can see I am not a very consistent baker as far as size goes.  Different widths were intentional (what if someone wants just a little bit of scone?), different heights were not :\   Bottoms are definitely darker than I intended (I'm blaming the cheap oven in my apartment that can't keep a proper temperature).

I added some orange food coloring to the drizzle. Normally I would have left it natural but I just got a new pack of colors and wanted to try them out (they are very vibrant). And....I just realized it looks like I drizzled melted cheese on a biscuit.... eh, still tasty!

Scones and tea anyone?


Read more


Bond the dog

12 March, 2017

Bond is my favorite subject for using software programs to make cool looking photos.  Google images often automatically creates stylized photos and gifs that turn out nicely.  I've also been having fun with the Prisma app on my phone.


Quotes

10 February, 2017

Regarding recent political events...


Some quotes I've been seeing around ever since there was such a thing as "President Trump"

To announce that there must be no criticism of the President, or that we are to stand by the President, right or wrong, is not only unpatriotic and servile, but is morally treasonable to the American public.

-- Theodore Roosevelt

 And this

Doublethink means the power of holding two contradictory beliefs in one's mind simultaneously, and accepting both of them.

-- George Orwell, 1984


The party told you to reject the evidence of your eyes and ears. It was their final, most essential command.

-- George Orwell, 1984


Merry Christmas!

23 December, 2016

And Happy New Year :)

Click on the tree below to decorate. Choose from the colors on the top right.

Click play to enjoy some festive music

Your browser does not support HTML5 Canvas. You need a better browser

Read more


More seasonal wreaths

14 November, 2016

Apparently wreaths are my new craft thing.  In particular, seeing how little money I can spend while making a decent looking wreath. I was originally going to get a wreath frame from Michael's and add things to it, but they wanted $6 for a small ring of flimsy styrofoam. And $12 for the sturdier kind.  Just a plain styrofoam ring.  No thank you.  

Fall leaves

I wanted a wreath for fall, and was looking for some sort of leaves I could put into a wreath shape.  I found some cheap coasters at Bed, Bath and Beyond: three packs of 4 maples leaves for $2 each.  Score.  They came in nice muted fall colors, just what I was looking for.

I decided 12 leaves with a little overlapping would make a decent size for my door.  I cut out a cardboard annulus from an old shipping box, making it thick enough to hold the leaves and its shape, without showing too much of the cardboard beneath.  (As usual, I did not take step by step pictures.)

Then it was a matter of spacing them evenly, alternating colors, and hot gluing them in place. After they were all in place, I added a few extra dollops of glue to make sure they stayed connected to the cardboard. I tied a dark green ribbon behind one of the leaves and around the carboard, so I could hang it from a hook on my door.  Not too bad for a $6 wreath.


White winter snowflakes

I have already made two Christmas-types wreaths, but I wanted a general "winter" wreath for after the holidays. 

For this one, my cheap materials came from the Dollar Tree.  I bought a 12 pack of simple foam snow flake shapes in white and silver sparkles. Then I got two packs of frilly snowflake ornaments with more sparkles.


Again, I cut out a thin annulus from cardboard (size was dictated by the size of the cardboard I had laying around).  I arranged 8 of the foam snowflakes onto the cardboard with just a little space between them, trying to maximize coverage of the cardboard. 

Hot glued those, then hot glued the frilly ornaments between them with lots of overlap. I took off the silver strings meant for hanging the ornaments, and used one of them for a loop to hang the wreath by.  Because the whole thing was so light, and the strings were short, I simply hot glued the string to the back of the ring.  A little of the cardboard still shows, but I didn't want the ring to be thinner and thus too flimsy. It works okay for me because it blends into the brown of my front door!