Because I have more time than money
Just some craft ideas with pictures of the final products. I've tried to include some instructions, but I don't have step-by-step photos. I don't have the discipline or wherewithal to plan ahead.
Just some craft ideas with pictures of the final products. I've tried to include some instructions, but I don't have step-by-step photos. I don't have the discipline or wherewithal to plan ahead.
a.k.a. "I knew saving that random swatch of tulle was pointful"
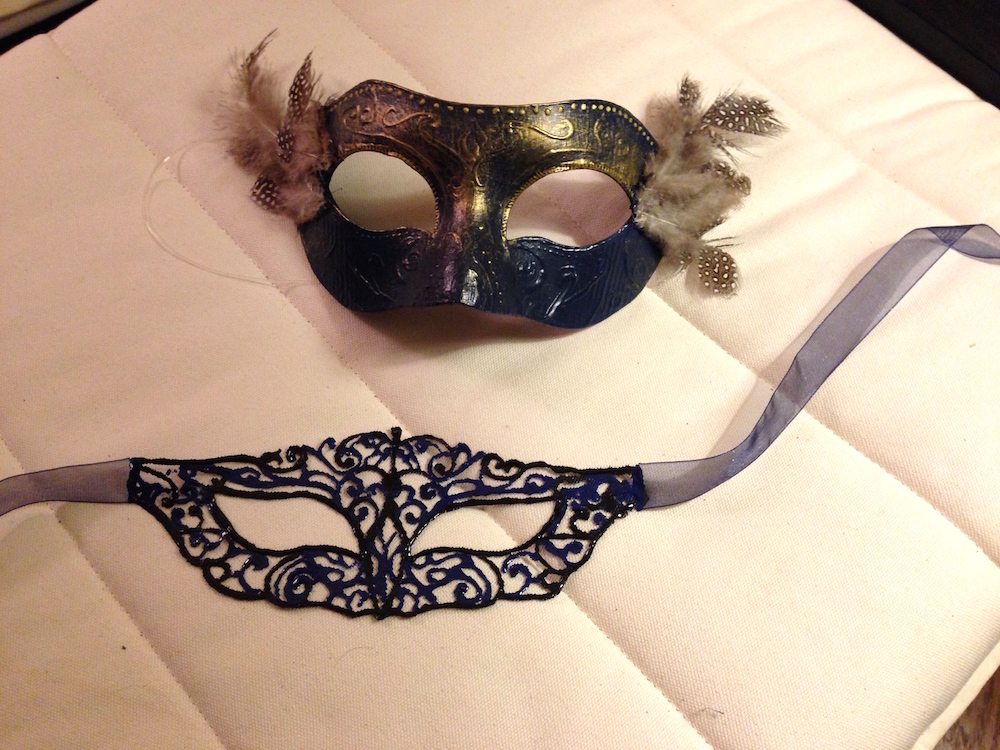
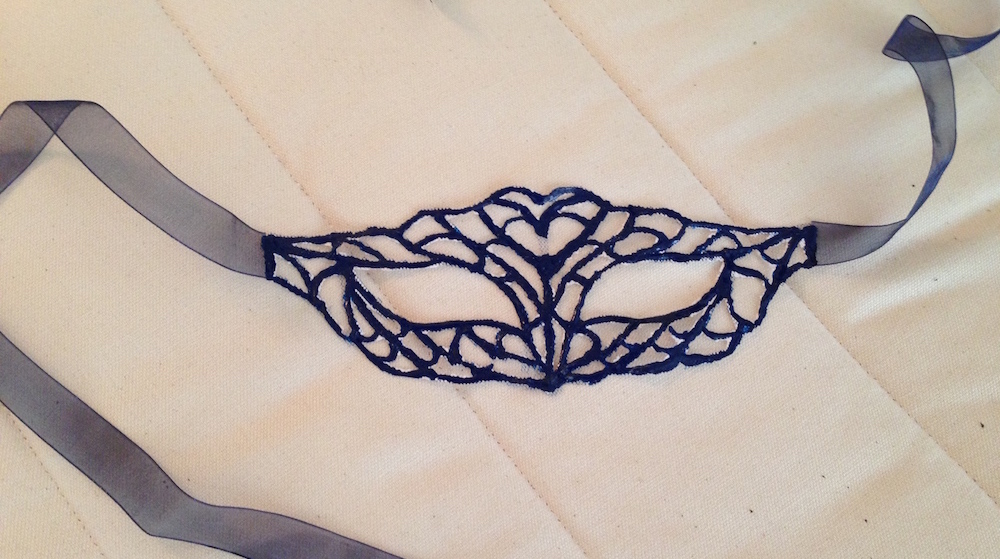
When presented with an occasion to wear a costume, I jumped on the chance. But I just wanted something subtle, so what better than a mask? Three masks! The lacy ones I made following this tutorial. It actually worked pretty well, so I luckily don't need to submit this to pinterest fails. It is made with fabric paint on tulle. I did one in both blue and black, and a different pattern in just dark blue. Don't forget the plastic wrap (that's what went not-quite-right with the blue one). I'm not a very precise crafter, so the fact that it turned out pretty well for me means it is totally doable, but I did take a practice run, and the lines are far from perfect.
I also bought a cheap craft mask from Michael's. I painted it gold, didn't like that; painted navy fabric paint swirls on it, still didn't liked it; painted over it in all dark blue, liked that. Then I added some gold highlights with an almost dry brush, dots with a Sharpie paint pen
, and a few feathers with a hot glue gun. I used stretchy jewelry cord instead of a ribbon to hold it on. Pretty simple.
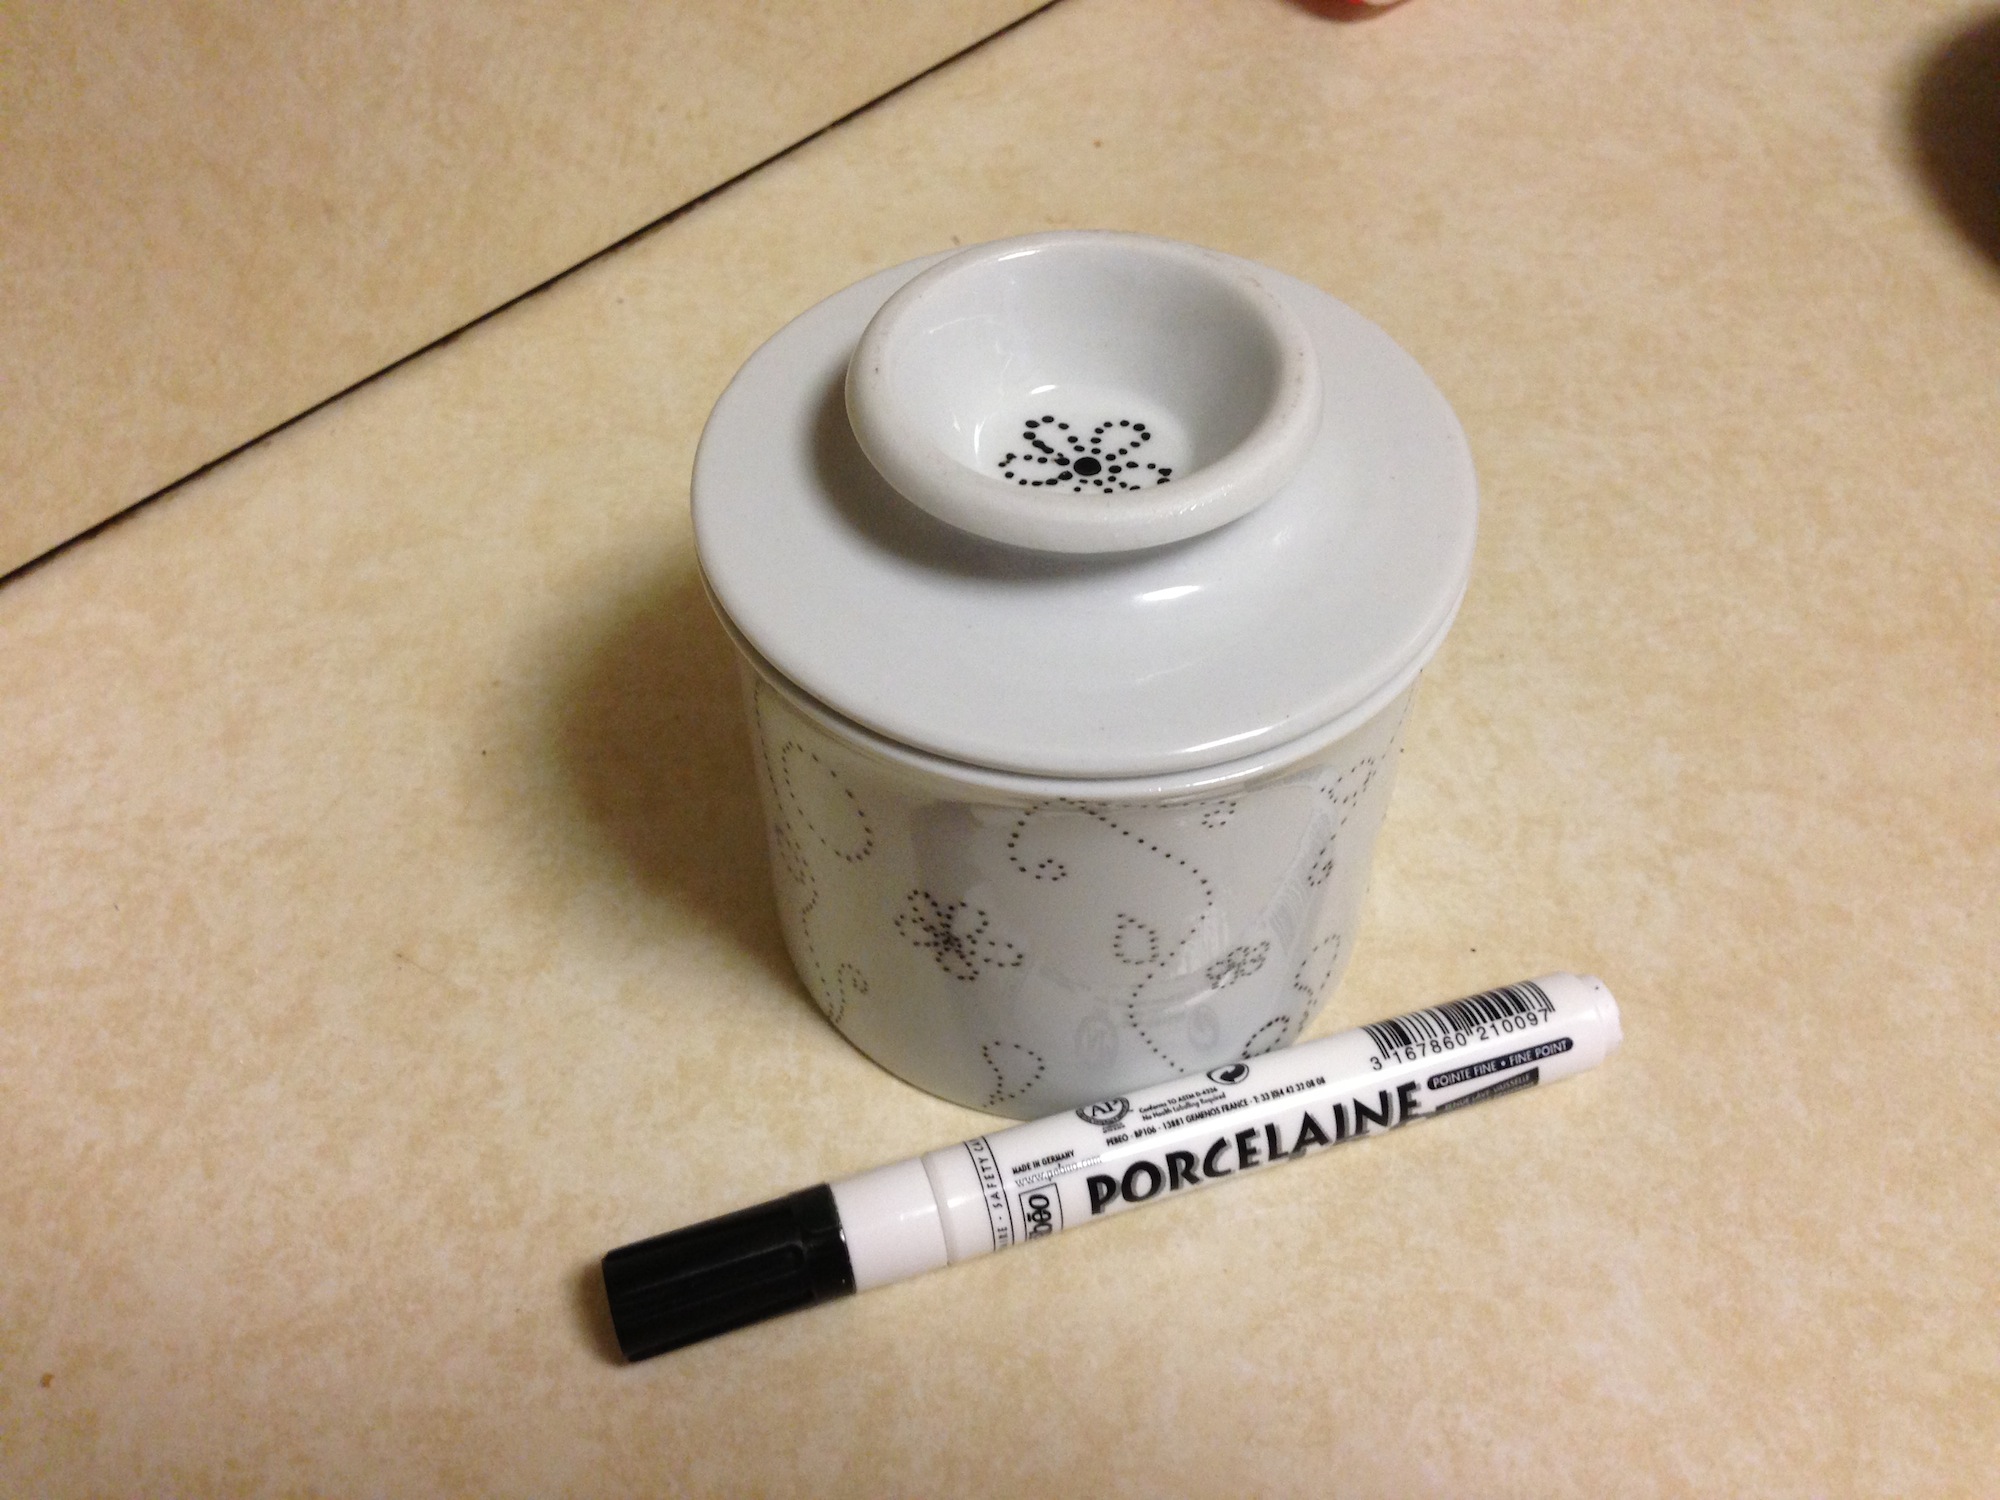
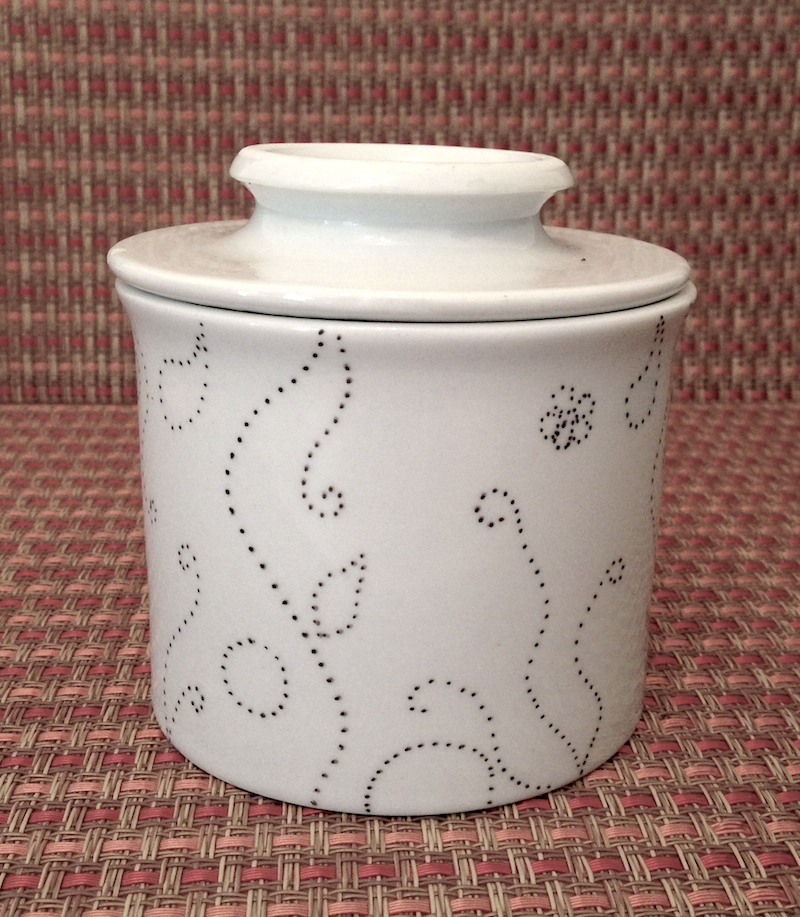
I bought a plain white butter dish and thought it looked a little boring, so I added some designs using a Pebeo Porcelaine pen. Just draw on the design you want, let dry 24 hours, then bake on 300°F for 30 minutes. Super easy once you get a hang of how the ink leaves this pen. I do abstract designs because mistakes are easy to cover up!
This is fun to do on cheap mugs, plates, bowls, anything ceramic.
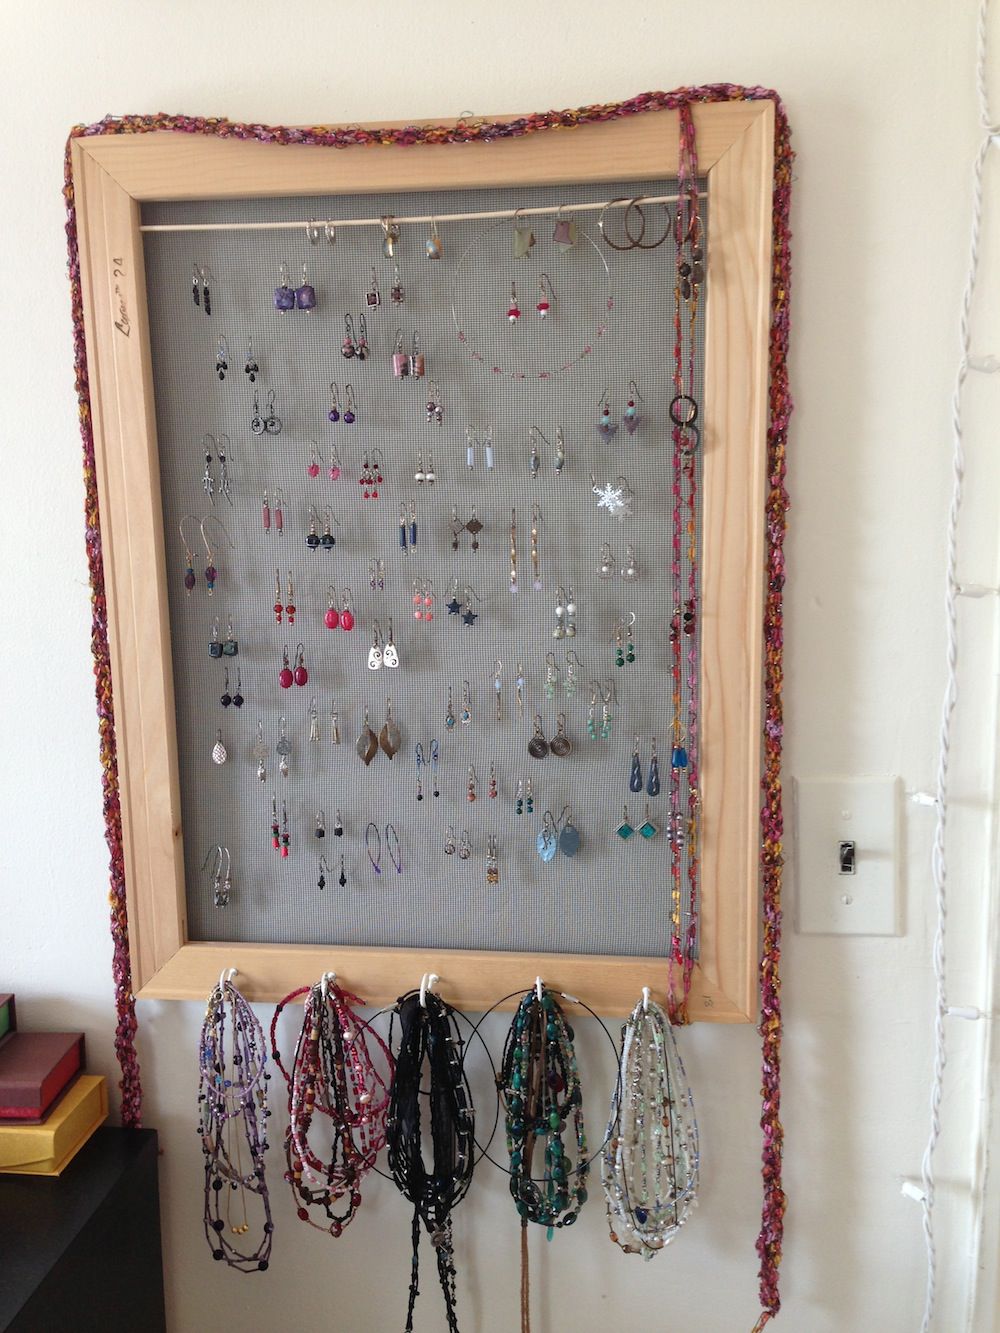

With my earrings in boxes I would forget what I have and would not always wear the optimal set (yes, there is such a thing). So I made an earring holder from an old frame and some screen I got from the hardware store. I used nylon screen, but metal might be more robust, if more difficult to work with. I cut it roughly to the size of the frame, then power-stapled it to the wood (thanks Dad!). Getting it stretched taut was the tricky part, but I think it turned out well and even survived a move halfway across the country. I also screwed in a couple hooks at the bottom for holding necklaces.
I used velcro-like sticky tab things to mount it to the wall. They have the advantage of being able to hold heavier items than regular sticky tabs, it is easier to make sure it is straight, and they are less permanent than nails.
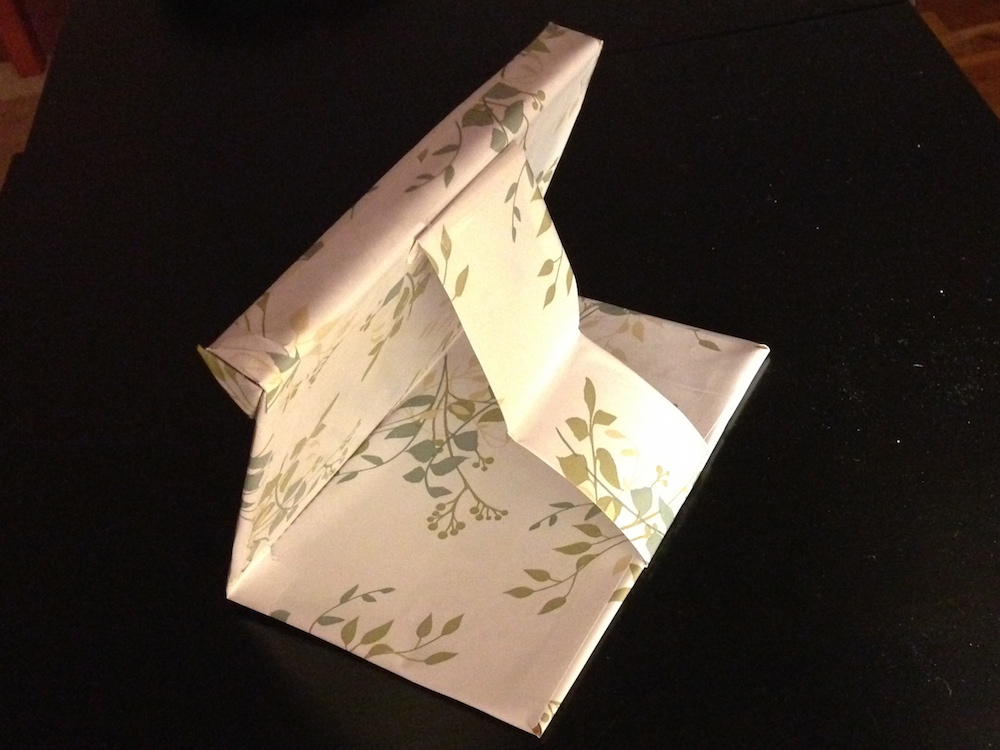
Usually I like to read in the comfort of my bed, or my couch, or my lounge chair, but on occasion I feel inspired to read at my desk (i.e., it is too likely I'll fall asleep if comfy). But holding the kindle is so much hassle! And what if I want to eat while I'm reading? Enter the cardboard kindle stand!
It is really simple. Find a piece of cardboard about as wide as your kindle and somewhat longer. The dimensions of mine are 8.25" (21 cm) wide and 12.5" (31 cm) long, but it really doesn't matter. Score along the width at 6" and 12", but on opposite sides (they will be folded in opposite directions). At this point I covered the cardboard with contact paper. This is optional, depending on how...rustic...you want it to look and how much effort you wish put in. I didn't do a very careful job. Whatever works for you is probably fabulous. I basically wrapped it like a present. I left the scored edges free of contact paper (or you can score or maybe even bend it), and then added a strip once the shape was in place. Between the two long sides, I attached a strip of paper (covered with contact paper, partially for strength), using clear packing tape. The paper is thin enough that I can fold the stand and store it out of the way. The trough for holding the kindle is held up with two triangles of cardboard taped to the sides with clear packing tape.
Because pictures speak louder than words, below is what the final product looks like.
I didn't take any "in progress" pictures, but I think the final version speaks for its creation. The last
picture is at a weird angle to show off the strip across the bottom.
Also featured are my super awesome left-handed scissors. I've had enough of discrimination against my handedness.


Courtesy of Pinterest, I found a couple fun craft ideas (still need more!)
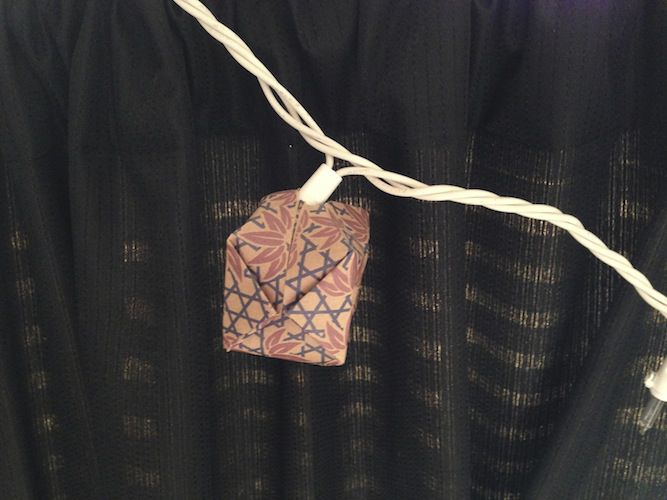
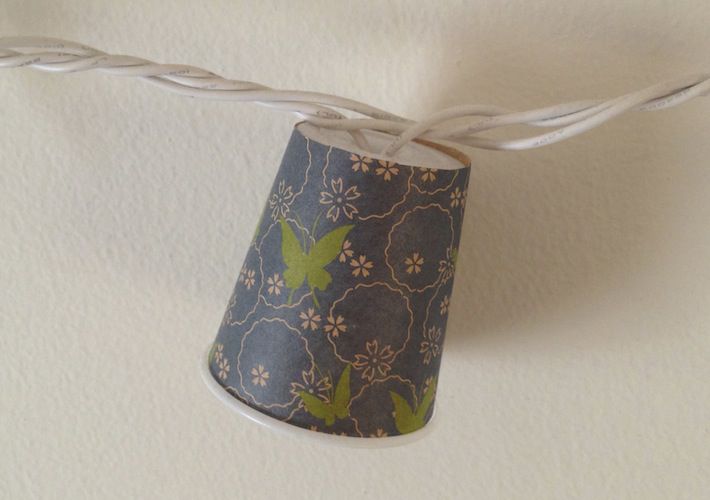
My favorite has been christmas light lanterns  .
I executed the craft myself with excellent success (unlike other Pinterest crafts, which I would probably fail).
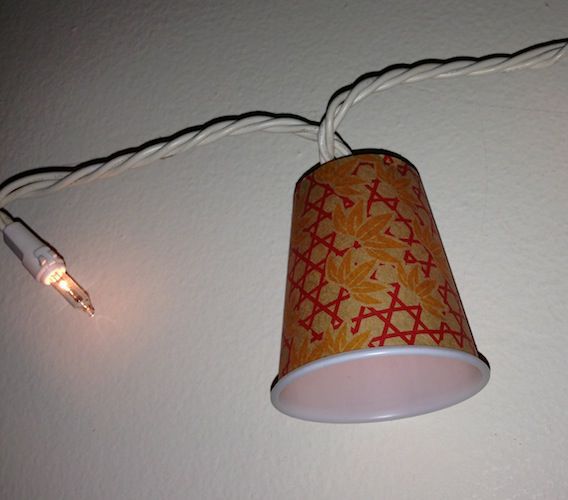
I did part of a string of lights with the origami lanterns and another part with cup lanterns.
I didn't use LED lights like I probably should have, but none of them have caught fire yet.
I used actual origami paper, but any thin paper cut in a square should work.
.
I executed the craft myself with excellent success (unlike other Pinterest crafts, which I would probably fail).
I did part of a string of lights with the origami lanterns and another part with cup lanterns.
I didn't use LED lights like I probably should have, but none of them have caught fire yet.
I used actual origami paper, but any thin paper cut in a square should work.
The cup lanterns are just small plastic cups with the same origami paper wrapped around them and taped. The only tricky part is cutting the paper with the correct curve to fit your cups. Alternatively, one could use fabric, or stamp the cups, or draw on them. So many options! Cut a small criss-cross in the bottom of the cup and stick a light through. Voila.

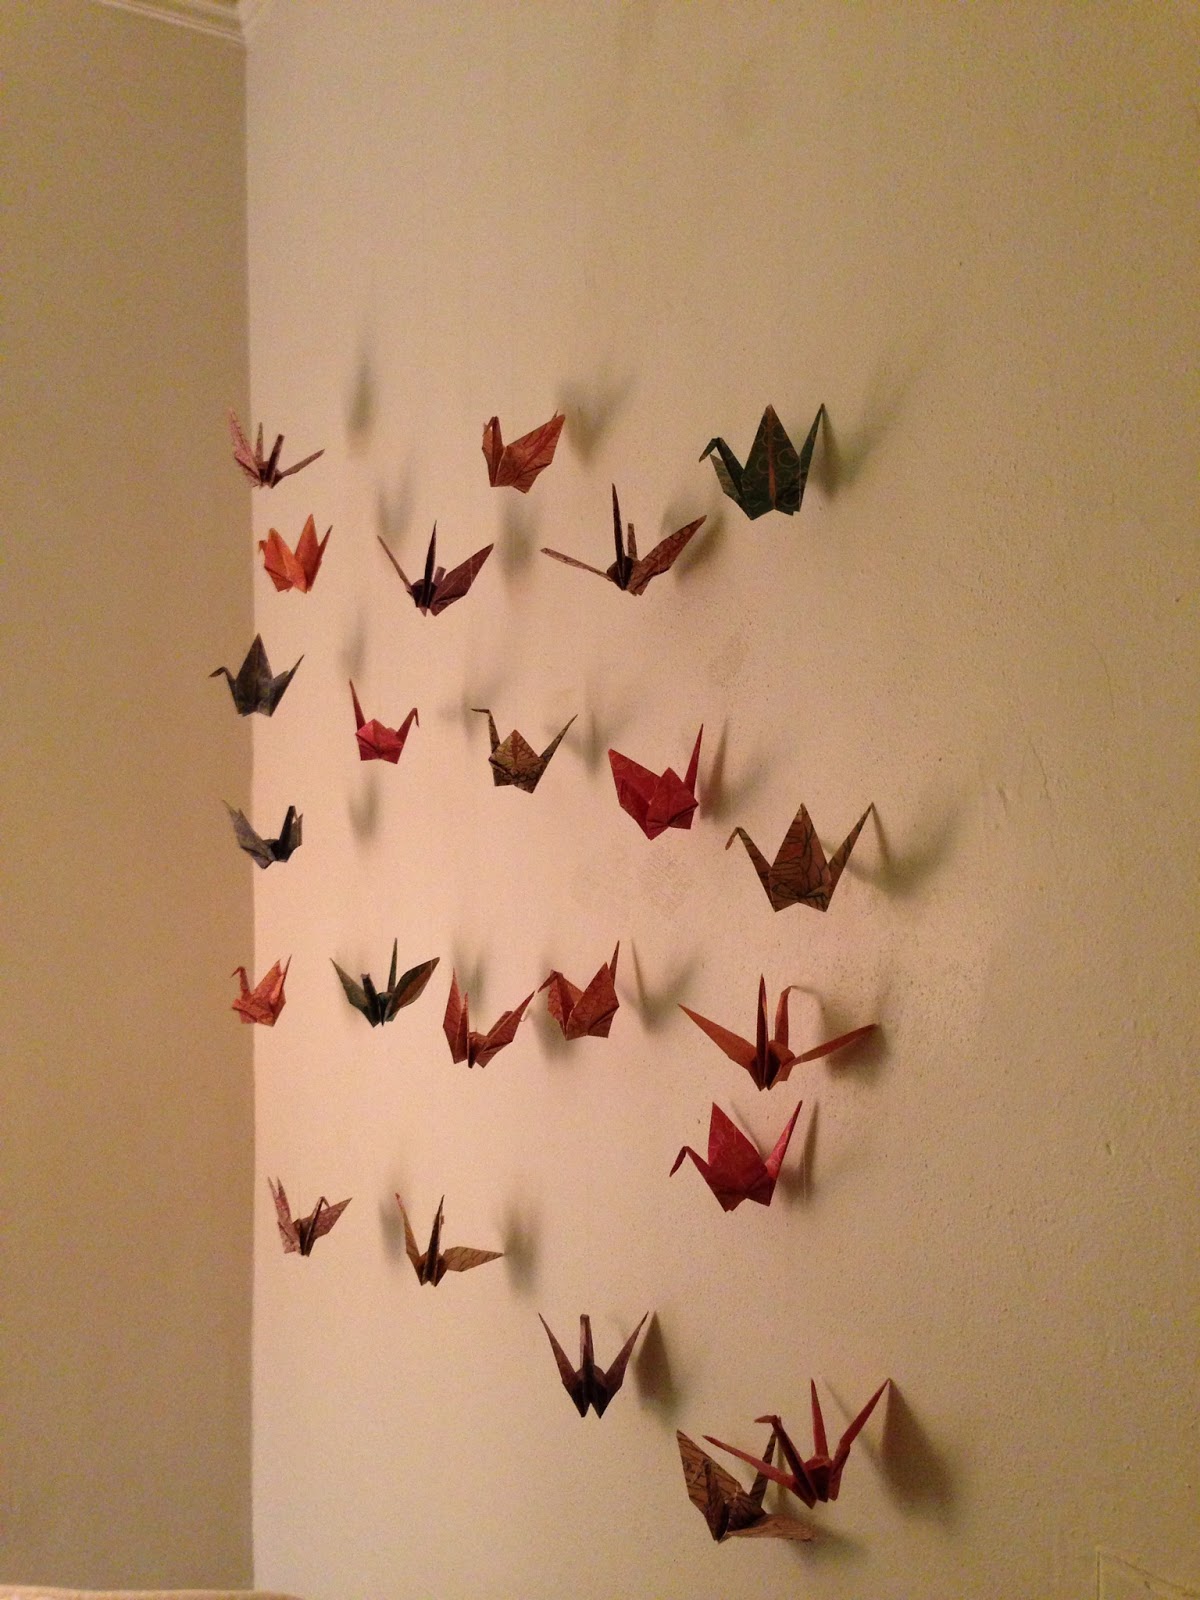 Had a blank wall, and a burgeoning "asian" theme in my living room, so what better to add than some paper cranes? I like 3D art, and thought it would be fun to have the birds floating. I was inspired by a crane mobile that my parents have in their study. I got some subtle origami paper that I liked, roughly matching the color scheme. Michael's has a good selection of papers.
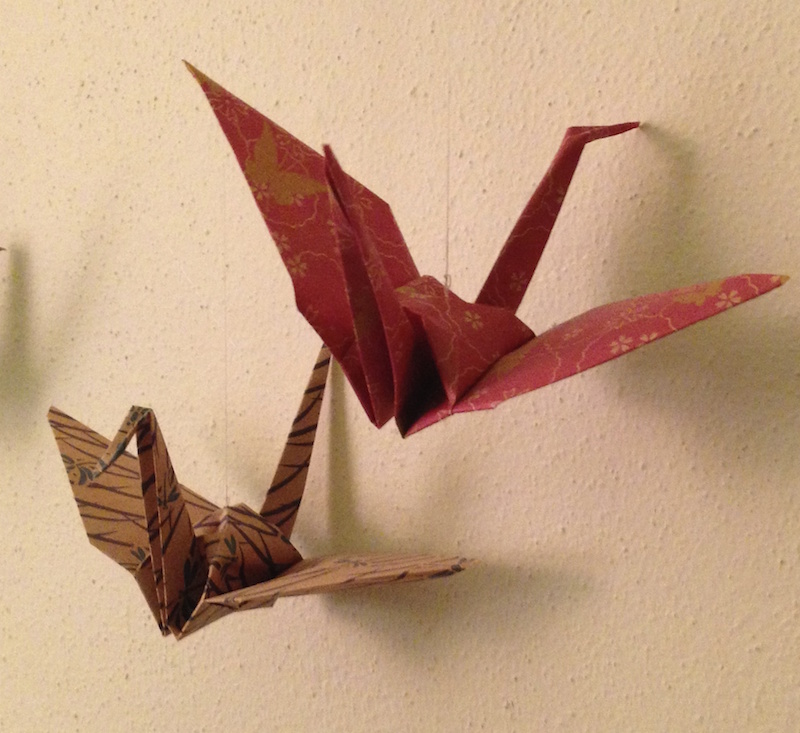 Fold the cranes carefully (instructions ). String a long length of sturdy thread through a needle and the needle through a small seed bead. Tie the thread around the seed bead. Poke the needle through the back of the crane and thread through so the crane is resting on the bead. This is the bottom crane. You can add more cranes to the same thread by adding another beed to the thread and loop it around twice in the location you want the crane to sit. Then add the next crane. And so on. And so forth. I didn't really plan mine ahead very well, and I'm impatient, so the locations are kinda random. With with a little planning they can be nicely aligned, maybe in diagonals? Or perfectly "randomized".
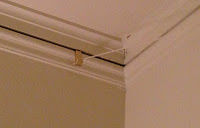 To mount on the wall, I tied a series of string, each with 2-3 cranes, onto a thicker string. I strung the string between two picture rail hooks from the hardware store. One of the hooks is on the adjacent wall, to bring the cranes away from the wall a bit and seem to float more. When I had both hooks on the same wall people would think they were attached directly to the wall.
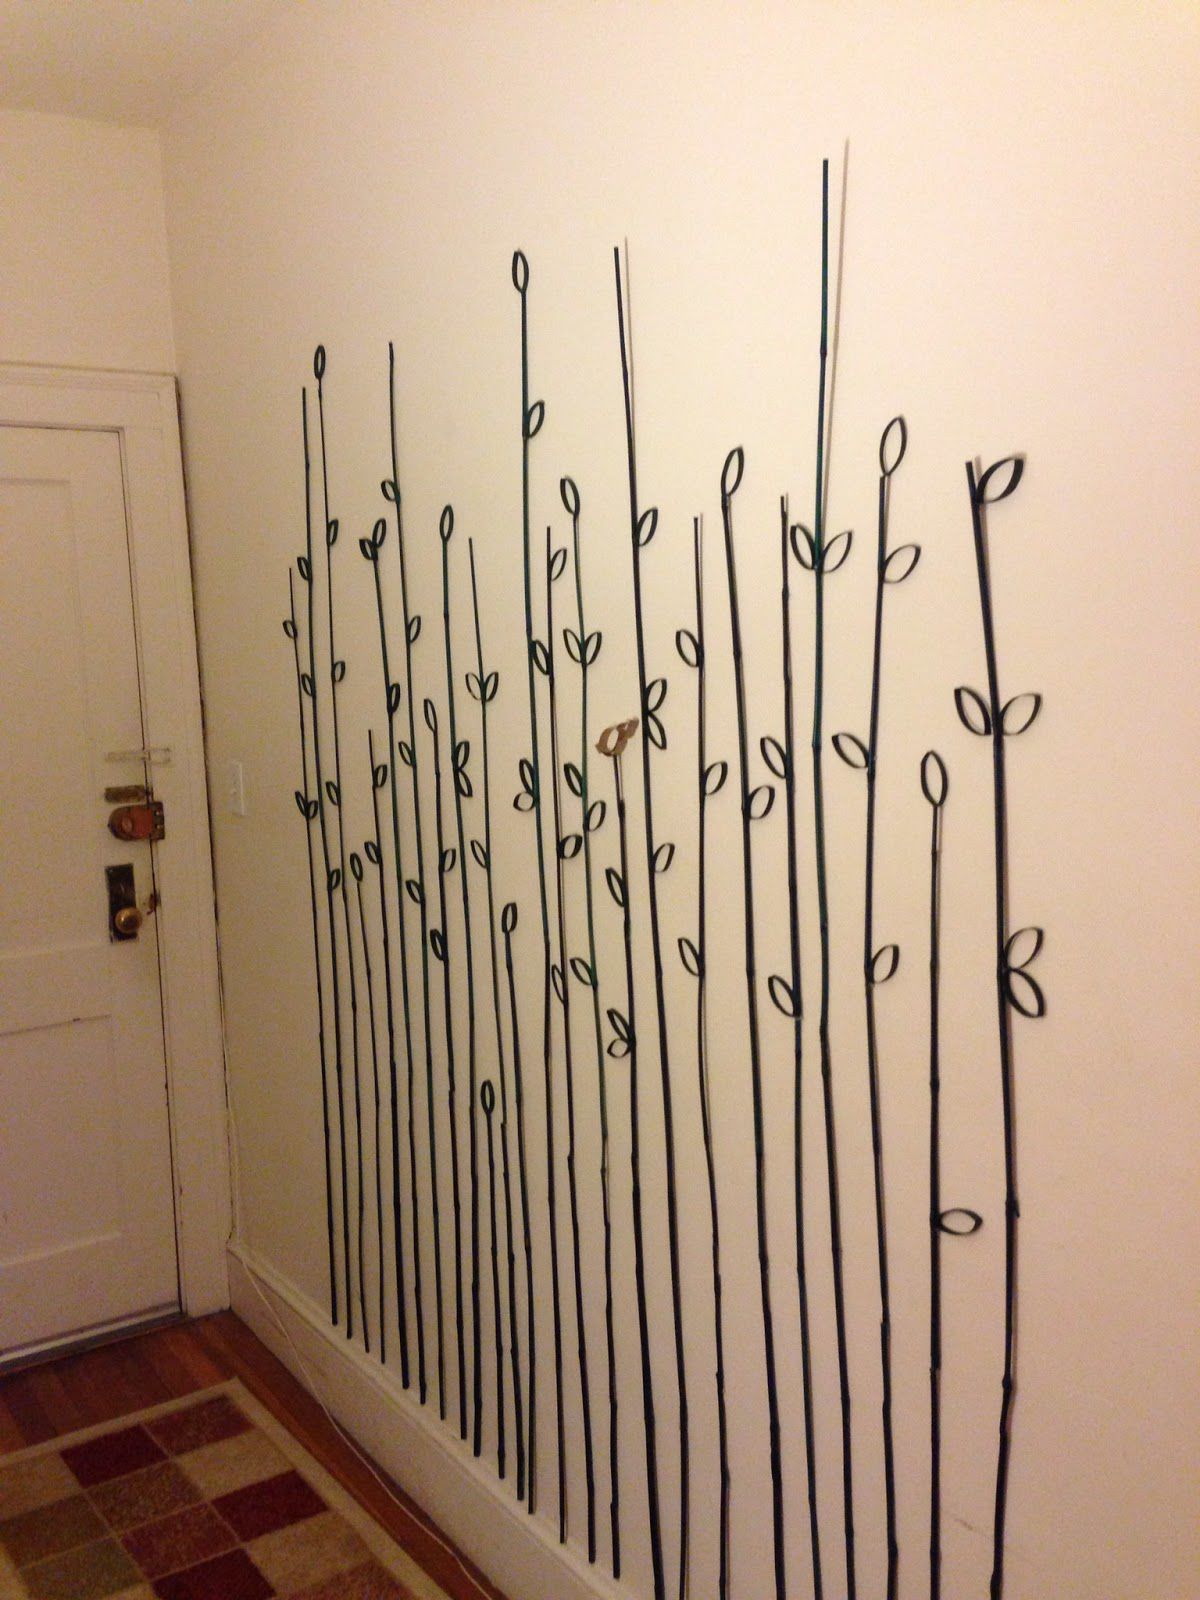 I no longer remember exactly where this idea came from. Partly from my mom I'm sure (can't have unsightly blank walls!). And thanks to some internet advice on attachment methods, I made myself a little bamboo forest on the entryway wall to my apartment. Per my lease instructions, I'm not supposed to put things on the wall for fear of damage. Not that it stopped any of the previous tenants. The walls in my apartment are far from pristine, but being the (almost) rule-obeying person that I am, I've devised alternatives to nails and screws.
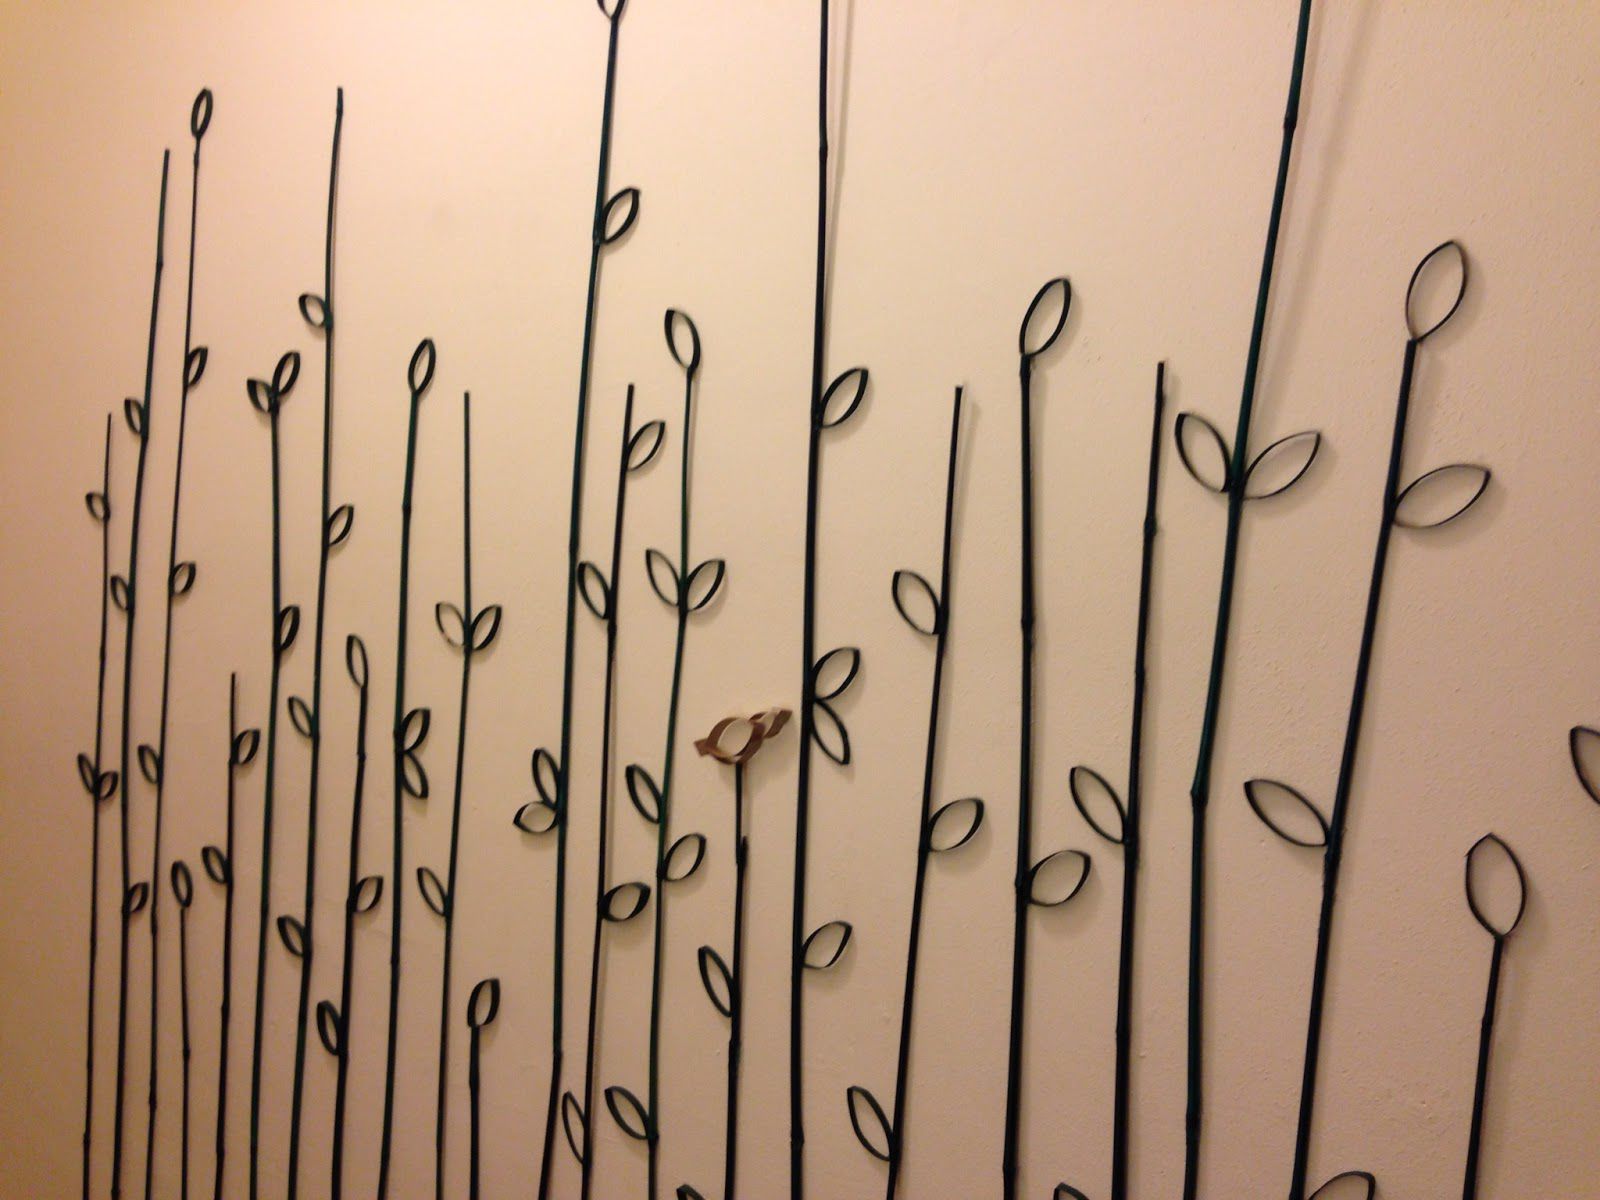 The bamboo is cheap stuff people use to stake plants in a garden:
Bamboo Canes 2-Feet.
The green rubs off a bit, but nothing too crazy, and you can also go natural colored.
I varied the heights my mixing and matching between the two and three feet canes, sometimes stacking, sometimes not.
The bamboo is cheap stuff people use to stake plants in a garden:
Bamboo Canes 2-Feet.
The green rubs off a bit, but nothing too crazy, and you can also go natural colored.
I varied the heights my mixing and matching between the two and three feet canes, sometimes stacking, sometimes not.
The leaves are slices of toilet paper rolls painted green to match the canes. Everything is attached with pure silicone caulk. That's where the time came in. First I arranged everything with tape, then slowly added caulk at the essential points to keep everything against the wall. Once it dried I removed the tape and excess caulk. Turned out pretty well. I first did a test piece of caulk to make sure the paint didn't come off with it. Success! But I'm still a little worried. But that worry can wait until I decide to move. Somewhat glossy paint isn't supposed to stick to silicone (thanks internet!).
So that's the making of the bamboo forest.
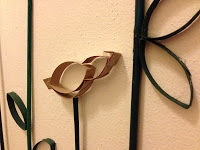
I also made a little brown birdy.